
I mentioned earlier that I had one of my quilts juried into Quilt Canada, which was held in Ottawa earlier this month. This is the fourth year in a row that I have had a quilt at Quilt Canada:) Bed of Roses, a pattern designed by Sue Garman, won the Award for Excellence in Applique. So humbled and so proud all at the same time:)
In other news, we have another grand baby on the way (our 3rd). The gender reveal party was a couple of weekends ago. Turns out we are having a…boy:) So much fun!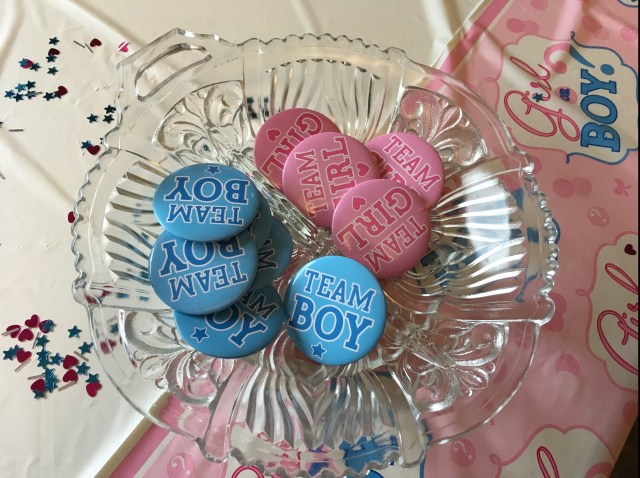


So…back to the Chickadee. In my last post, I showed you how I prepped my templates and traced the pattern onto my background. This is the last photo that I showed. Hopefully, you are getting the hang of figuring out “which piece goes where”. It is a skill that comes with experience. Trust me:)
So now I am going to continue gluing pieces onto the background, always placing the bottom layer first. For this section you can see I added the purple buds, and the light green leaf in 2 sections.
Next I added the dark green leaf, then bias strip, and then the 2 leaves on either side of the purple buds.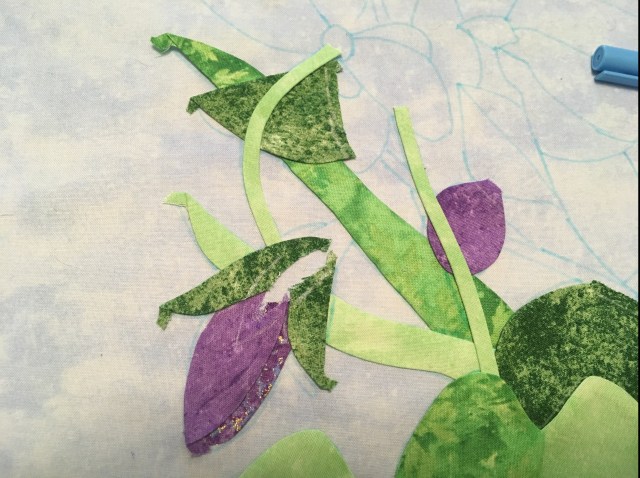
Now I can add the light green leaf, which tucks underneath the purple berry. So this “section” is now complete (except that it still has to be stitched lol)
Now it is time to start adding some flowers. The flowers are all created in the same manner. Before I started gluing this flower in place, first I had to add the bias stem. Remember to glue the background, as opposed to the bias stem.
So, first I place the light purple petal in place. Then I added the tiny dark purple section. And then I added the larger purple petal. 
Then I added the tiny dark purple section.
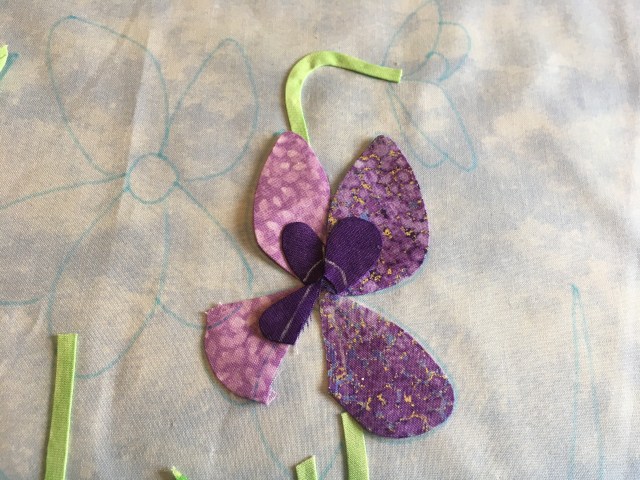
Can you see the beauty of drawing the seam allowance on each piece? Now I can see exactly where my last piece goes…and no raw edges!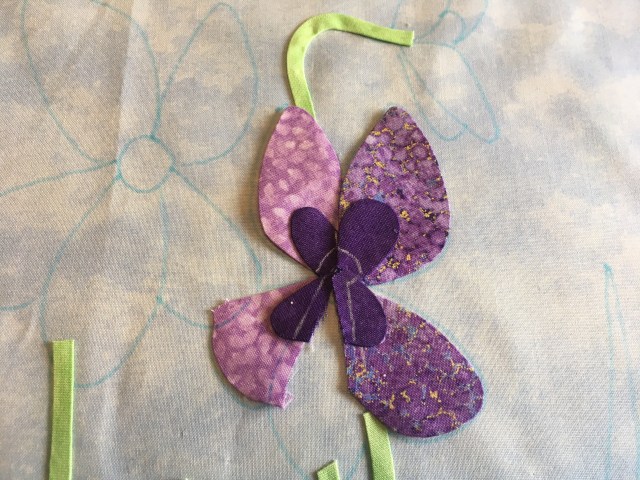


Ta da! 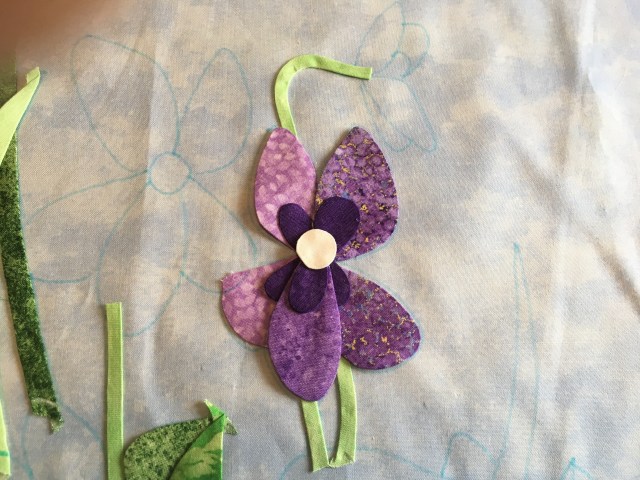
This photo shows everything glued in place…except the Chickadee. Which I am going to go and do right now! Just a note: You don’t have to wait until every piece is glued in place before you start stitching. Usually, I prep a few pieces, or maybe a section, and then I go and stitch it. I would rather not leave all the stitching til the end.
Til next time….
Kerry

CONGRATULATIONS Kerri
Sent from my iPad
>
Thanks so much!
Amazing work!!
Congrats Kerry.
Thanks Lynn:)
Hi Kerry I just wanted to thank you for loaning me your Unicorn quilt. I haven’t been able to get it done yet and was wondering if it was ok for me to keep it a little longer. I hope to start it in the next couple of weeks. I didn’t want you to think I had forgotten about it. Should you need it for a trunk show just let me know and I will get it back to you right away. I very much appreciate the fact that you would loan it to me.
Darlene Jackson
Sent from my iPad
>
No problem:)
Saw your beautiful quilt in Ottawa! What a beauty!! It certainly deserved the award!!!
Thank you so much!
An award of excellence AND a new grandson on the way?! CONGRATULATIONS all around!! How exciting!! Are you using the blue washaway marker to draw the placement lines on your background block? Your work is so exquisite and I really appreciate the clear, close up photos detailing your process.
HI Rebecca Thanks! Yes I am using a Clover wash out marker to mark my background.
Kerry
Congratulations Kerry on yet another gorgeous quilt!!!!Debbie Pearcey
Thank you Debbie. Nice to hear from you:)
Congratulations, your quilt is gorgeous! Well deserved.
Your work is so gorgeous and I hope to be able to take a class from you some day! I hope you will keep teaching in Williamsburg because I hope to go! We lived near there from 1996-1999 and it is a wonderful place!
Hi Patricia: I love Williamsburg and teaching there is the highlight of my year:)
Kerry
Your Roses quilt is just a magnificent piece of workmanship!! You should be “just a bit” proud of yourself!! 🙂