Very Slow Stitching Sunday

I have finally(!) finished all of the applique and embroidery on by Friends of Baltimore!  Yippee!

DSCN6649

Today, I am stitching the 342 half-square triangles that will go all around the quilt.  Because I am so very close to a finish, it just seems to be taking forever to sew these triangles together.  If you would like to see how I stitch my triangles, you can look at this post.

DSCN6699

I am linking up to Slow Stitching Sunday and also WIPs Be Gone.  Check out both sites and see some awesome stitching!

Til next time….

Kerry

Inklingo 101-Update

In one of my recent posts, I mentioned my newest obsession….Inklingo.  Many readers commented or emailed me and said that they would love to try Inklingo, but just cannot get their head around the concept.  Some readers said they have already created an account, but even downloading the Free Shape Collection seemed very overwhelming.  That made me sad, because  I, too, was  overwhelmed when I first went on the Inklingo website.  I spent 3 days browsing the site, watching the videos, checking out the shapes, and all the different sizes of each shape. Each time I went on the website, I was getting more and more curious.  I was very intrigued with the concept, handpiecing verses EPP, not having to use paper templates anymore, even using Inklingo to stitch shapes on the sewing machine.  My head was spinning with ideas, but I was more than a little overwhelmed with all of the information. I honestly didn’t know where to begin.  I decided that the only way I was going to learn about Inklingo was to just start printing.  So I made a pot of tea and spent a couple of hours with my printer, some fabric and some freezer paper (and an open mind)  to see if I could figure this Inklingo thing out.  I am so glad I did…so glad…so glad!   The best part is…all of that information on the website and the videos started to make so much sense after I printed my very first set of shapes.  I would love to share my experience with you in the hopes that you will just give it a try.  You will be glad you did!  If you have any question at all, Linda is the one to ask.  Simply email her and she will get right back to you.

First, you will need to set up an account.  If you haven’t set up an account yet, check out this link  and just follow the easy steps.

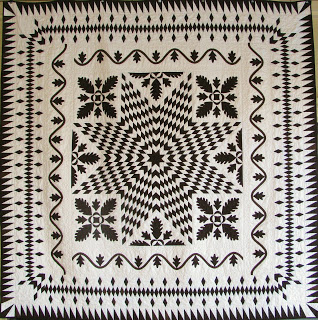
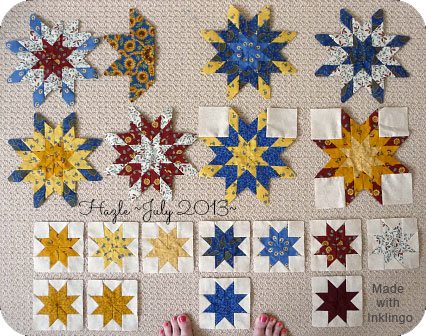
Are you ready?  I am using the “Free Shape Collection” as my first example.  First, order the pattern (even though it is free) and you will immediately receive an email from Linda explaining how to download the pattern to your computer. Once you have downloaded the pattern, you will find it in your “Downloads”.  You now own that pattern forever!  If you scroll through all of the pages, you will see that there are pages and pages of every shape (diamond, triangle and square) in all of the 20 colours.  Bet you are wondering “oh my gosh…where do I start…what should I print?”  We aren’t going to print any of those pages, at least, not right now!   Those pages are for those of you who are going to become truly addicted (like me!) and want to make hundreds and hundreds of eight-pointed stars, or just want to print some triangles and start stitching them together. You can use any combination of those 3 shapes to make some pretty awesome designs.  Here are just a few…

free-shapes-Hazle

Sally Post Floral medallion lonestar finished 10.2.2009 81 x 81

for tilde 75 x 75 inklingo lonestar

OK, so now we are going to go straight to Page 70, and you will see that Linda has designed a combination (Combo 2) of all the shapes.  That is the combo I used to make these stars.

DSCN6489

DSCN6688

We are going to print the combo, one on a light piece of fabric and one on a  dark of fabric. First question….what colour of ink are we going to use?  I did a colour sample and you can see that there is not just one “correct” answer.   Important note: Testing is important so you know the ink will not bleed or show on the front.  Make sure you read this article on testing the inks on your fabrics.  http://www.inklingo.com/blog/how-to-test-inkjet-ink-on-fabric/

DSCN6675

My Test Sample.

DSCN6676

Take the time to print a few of these samples on the fabrics you are using and use them as a reference, just to see how the inks work with different colours of fabric.  Once you have tested your fabric, go to the corresponding page and print the combo.

DSCN6694

Cut yourself 2 sheets of freezer paper 6 3/4″ x 9 3/4″.  Press each one to the right side of 2 different fabrics, preferably a light and a dark.  It is much easier to cut around the freezer paper, instead of cutting the fabric the same size as the freezer paper and trying to line them up…trust me!

DSCN6679

DSCN6680

Place the fabric/freezer paper (freezer paper side up) into the printer and click on the Print icon. Make sure you click on “current page” and “portrait”.  This is extremely important!

DSCN6685

Ta-da!   You are a superstar!  Now, do it again with the other piece of fabric/freezer paper.  Too easy!  If you are wondering how to stitch this eight pointed star together, here is a great video, showing a Kaleidoscope Star, but it is the same idea!  P.S…..make sure you watch Part 2.

DSCN6682

I have an HP printer and (as far as I know) I cannot print Custom Sizes.  That has not stopped me from printing my shapes. Once I became familiar with printing the free pattern, I thought I might as well jump in and buy the 1″ hexagon shape (and the 2″ hexagon and the 2″star point!).  Just like the free diamond shape, all of these shapes come with numerous layouts and each layout can be printed with all 20 colours of ink.  So there are lots (and lots!) of pages to scroll through.  If you click on Page 13….

DSCN6660

…you will see different sizes of freezer paper with the number of hexies that you will get out of each sheet.  Make a couple of paper copies of this page.  You will want to refer to them from time to time.   I started off with just printing a 7.25″ x 11″ page just for the fun of it.  What did I have to lose?  Nothing!!

DSCN6666

Then I thought that maybe I did not want 12 hexies from the same fabric and maybe I wanted a scrappier look.  Then I started cutting 5.75 x 7.5 pieces of freezer paper and lo and behold…..I ended up with just 6 hexies!  Everything was starting to make sense!

DSCN6665

One of my many “aha moments” came when I thought…”I wonder if I can print on a 5″ square”.  So, I fed a 5″ x 5″ piece of fabric/freezer paper into the printer and this is what came out.  I used the same layout as the fabric above.

DSCN6668

Then the creative wheels started spinning…I thought…oh wouldn’t it be cool if I could just fit another hexies in there, then I could get 3 hexies instead of 2.  I must admit, by this time my mind was racing and I could see why Linda offers so many different layouts.  When I first saw this layout (Page 75) and saw that it is intended to be cut with scissors and not a rotary cutter, I was really stumped…

DSCN6692

…I wondered who in their right mind would want to cut all those hexies apart with scissors.  But if you had 5″ piece of fabric and wanted to get as many hexies out of it that you could, cutting them apart with scissors is an excellent idea!

DSCN6672

Now I am on a roll!!

DSCN6673

That is when I started to realize that the more I played around with Inklingo, the more I was learning and the more excited I was getting.  Here is another very useful bit of information. You may be wondering what the difference between “Portrait” and “Landscape” is, so I did sample of each.  Both are the same layout and I cut both pieces of fabric/freezer paper 8 1/4″ x 12″.  Can you see the difference?  The one on the right is printed “Landscape” and gives us 15 hexies and no waste at all.  The one of the left is printed “Portrait” and only gives us only 12 hexies with lots of wasted fabric.  See?  It is really all very useful information!

DSCN6664

Hopefully, I have convinced you to give Inklingo a try.  It is actually very simple to use, once you spend a bit of time just printing for the fun of it!  This is what I am currently working on using the 1″ hexies.  I am hand-piecing them, which is done with a simple running stitch, very much the same as the handquilting stitch.  This video sums it all up!

DSCN6677

And here is the back!

DSCN6678

Once I started printing and stitching, I couldn’t stop!

DSCN6696

DSCN6695

Til next time….

Kerry


Slow Stitching Sunday

Today I am on a mission….I am going to finish this last corner block of Sue Garman’s “Friends of Baltimore”.  After that I will sew the remaining half-square triangles that will be stitched to the edge of the border.  I told my family that I am having a “me day” and if they need me, I’ll be in my sewing room…with the door shut!  I am linking up to Slow Stitching Sunday, so go on over and check it all out!!

DSCN6640

Yesterday I stopped at a delightful quilt shop in Shelburne, Ontario called “Cobwebs and Caviar”.  I spotted this spectacular fabric and just had to have some.  I have no immediate plans for it, I just had to have some!  It is by French General.DSCN6641

And, my hexies are coming along quite nicely.  Edyta Sitar has a new book called “Handfuls of Scraps” and I am using her quilt on the cover as a bit of a road map.

DSCN6639

Till next time….

Kerry

“A Dog’s Breakfast”

My favourite teacher in high school had an interesting saying.  If something was gross or disgusting to him, he used to say “It looks like a dog’s breakfast.”  I have been thinking of him a lot lately, because when I look at the back of my hand-piecing, I think “it looks like a dog’s breakfast…how am I going to iron that flat??”  So, here are a few simple pressing tips that everyone who hand-pieces needs to know.

First, go put the kettle on and make a pot of tea.  Everything is easier to do when you are drinking tea.  Speaking of tea, my friend Kathy (an awesome and way-out-there quilter) gave me this tea pot for Christmas, along with an assortment of tea.

DSCN6634

My daughter gave me a Downton Abbey mug and Marilyn (a talented artist who designed my BOM “To Everything There Is a Season”) gave me a Downton Abbey tea towel, so I am all set!

DSCN6636

Now that I think about it, Marilyn gave me a Downton Abbey teapot last year for Christmas.  Hmmm…. I see a pattern here!

DSCN6638

Ok, so here we go.  We want the seam allowances to swirl in the same direction (either clockwise or counter-clockwise), to reduce bulk.  Here are just 3 hexies and I have swirled the seam allowances.  First, I just picked one of the seam allowances and pressed it to the right.  (It’s under the iron.)

DSCN6616

Next, I take my left hand and position my fingers on the connecting seam allowances, folding them in the same direction as the first one.  Notice that all 3 seams are going counter-clockwise.  That is about as complicated as it is going to get.  Seriously!  So, just  remember this, we are only swirling 3 connecting seam allowances at a time.  Do you notice what shape appears in the very centre when swirled correctly?  It is a quilt block called “Building Blocks”. Magical!  I am using Inklingo to make my hexies.  It’s as easy as stitching on the line!

pic 1

In this next example, I have stitched these hexies together and am now ready to start pressing.  “Looks like a dog’s breakfast.”

DSCN6617

I am going to do exactly what I did when I only had 3 hexies…press the first seam to the right…the one under the tip of the iron.

DSCN6618

Next, I position my left hand and guide the seam allowances in the same direction as the first one…

DSCN6619

Voila!DSCN6620

So now I can see that the orange seam allowance is heading in a clockwise direction, so the connecting seam allowance have to follow in the same direction.  Notice my index finger and my thumb are holding the seam allowances in place.  Then I just pick up the iron and press.

pic 2

Here is the finished block from the back….

DSCN6625

…and the front.  Fancy!

DSCN6626

I finished stitching the corner block of Friends of Baltimore and dipped it in the sink to wash all of the ink and glue out.  Now, I am finishing the next corner block.  Cannot wait to finish this quilt!

DSCN6598

Once it is dry, I will trim it to the proper size.

DSCN6599

Til next time….

Kerry

Slow Stitching Sunday

This past week I have been busy with non-quilting activities, but I still managed to find the time to work away on the last corner block in the border of Sue Garman’s “Friends of Baltimore”.  And, as usual, I started with the vase.  This just might be my favourite vase!

i00752

i00756

i00750

Slowly, I filled the vase….first with some stems and leaves.   You can see that some of the leaves and flowers cover the seam line and flow from the block onto the border.

DSCN6571

DSCN6573

DSCN6574

DSCN6575

DSCN6577

So now I have prepped as far as I can.  I am going to stitch everything…well, maybe not everything!… in place this afternoon at my Sunday Afternoon Applique Group.  Once all of the stitching is done,  I will attach this border to the rest of the quilt, and then fill in the missing pieces.  I am linking up to Slow Stitching Sunday.  Check it out and see what some fine quilters are up to today!

DSCN6580

DSCN6579

My hexies are taking on a life of their own.  I am not exactly sure where this quilt is heading.  I am just making it up as I go!  Have you tried Inklingo yet?  All of these hexies were made using Inklingo.  Inklingo is fast, efficient, super-simple and extremely addictive!  Betcha can’t make just one!!

DSCN6584

And, finally, a couple of people asked me if I would show the back of my hexie stitching once it has been pressed.  It’s all about  spiralling the seams!

DSCN6583

Til next time….

Kerry


So Close to a Finish!

I am in the process of finishing  the fourth and final (!) border of Sue Garman’s “Friends of Baltimore”.  Once the flowers, vines and leaves were finished, I appliqued all of the tiny details, like the red berries, the yellow centers of the roses.  The embroidery is done with just one strand of floss.

DSCN6539

Once that was finally finished, I did what I did to all of my blocks and borders once I am finished stitching them….I poured a warm bath, added some suds….and tossed the border in!

DSCN6540

Why do I do this?  I do this because I use glue, starch and marking pens on my quilt blocks, so I want all of that to be removed before I stitch the blocks together.  If you want, you can watch my Youtube video on Washing Blocks and you can also check out this post.

After the border was dry, I auditioned it along side the rest of the quilt.  I think Jenny and Bruin are pleased with the results!

DSCN6545

As you can see, I am not finished yet!  I still have the remaining 2 corner blocks to do.  Wanting to keep the momentum going, I started with the vase, an easy place to start.

DSCN6532

DSCN6534

DSCN6536

Next, I started to add some leaves to the vase.  I have found this little tip to be very helpful when lining up mulitple pieces.  I prep the piece as usual and then remove the freezer paper template.  I flip the template over and place it on top of the prepped piece.  Then I draw on the remaining seam allowance.

DSCN6546

DSCN6547

As you start to glue the pieces in place, you can also see the emerging shape that will cover all of those raw edges (in this case, the rose).DSCN6548

DSCN6549

DSCN6554

And now I can start to fill in the rest of the vase.  Lovely!

DSCN6556

Til next time….

Kerry

My Addiction Continues!

My addiction to Inlingo continues.  When I printed the my first set of hexagon shapes, I thought I might  just stitch a few together and make a small project like a table runner.  Well, my pile of hexies has magically grown and I think a full sized quilt is in the making!  I can’t seem to stop making them!

DSCN6530

If you have been reading my blog, you know that I made a Grandmother’s Flower Garden quilt last year.  I bought some paper hexagon shapes and away I went!  You can read about that here.  I basted the fabric onto the paper templates and then whip-stitched the pieces together.  I even tried glueing the seam allowance in place but found it very messy and the paper templates popped out before they were stitched together and that irritated me.

So, having done both methods of hexagons (English Paper Piecing and Inklingo) I must say I prefer Inklingo.  Why?  It is just so efficient and so easy…no paper templates to buy or cut, no basting or glueing seam allowances and no taking the basting threads out.  Just simply print…

DSCN6517

cut….

DSCN6518

DSCN6521

…and stitch.  Easy Peasy!!

DSCN6523

DSCN6525

DSCN6528

I am linking up to Slow Stitching Sunday.  Check it out and see what other quilters are doing on this cold, wintery day!

Til next time…

Kerry


To Everything There Is A Season…Block 10

Happy New Year!  Here is the 10th block of “To Everything There Is A Season”, a  BOM I launched last April.

cardinal for blog

If you haven’t seen the blocks, here they are!  The blocks are available on my website Simple Bird Studio.

DSCN6516

I am sooooo close to finishing Sue Garman’s “Friends of Baltimore”!  Once the border is finished, I just have to do the two corner blocks.  Then add the sawtooth border.  Then quilt it.  Then bind it.  Remember, one stitch at a time!!

DSCN6508

DSCN6509

Til next time….

Kerry


Happy New Year!!

It’s been an awesome year!  I finished 4 quilts this year…..

DSCN5927

DSCN6353

DSCN6141

DSCN5247

I was hoping to have the last border of Friends of Baltimore finished, but I am still working on it!

DSCN6481

DSCN6482

DSCN6503

DSCN6505

in 2014, I became obsessive about hexies and see them everywhere!  Last night at Home Depot, this caught my eye!

photo 2

And this!

photo 1

Speaking of hexies, I am all set for New Years Day.  I’ll be stitching the day away!   I have discovered the wonderful world of Inlingo!  If you haven’t heard of it, take some time and check out the website .  Download the free pattern, make some stars and then start dreaming of what else you can hand-piece.  It’s magical!!

DSCN6502

DSCN6506

I hope you have a wonderful and safe New Year!!  Thanks to everyone who reads my blog….without you, blogging would be pretty boring!!

See you in 2015….

Kerry

Slow Stitching Sunday

I have discovered the addictive (very addictive!) world of Hand-Piecing!  A couple of weeks ago, I decided to start another hexie quilt.  I needed a little inspiration so I found myself on Pinterest admiring the hundreds and hundreds of hexie quilt images.  Long story short, I clicked on a hexie quilt that was made using Inklingo.  I had heard of Inklingo a couple of years ago, even spent some time on the website, but that is all that became of it.  This time when I checked out the website, I could see the beauty of the Inklingo concept.  First I downloaded the free pattern for the diamond stars, fired up my ink-jet printer, watched a few Inklingo videos on Youtube, threaded up a needle and BAM!!  Before I knew it, I had completed four stars!!

DSCN6489

So, then I thought “If I can hand-piece these stars, I can hand-piece anything, including hexies!”  I purchased the 2″ hexie patterns and the rest is history!  So this is what I have been working on today….I am linking up to Kathy’s Slow Stitching Sunday.  Check it out and see what quilters are working on today!

DSCN6490

Pressing these hexies are easy when you know how!

DSCN6491

Til next time….

Kerry