A Bit of This and That:)

Hard to believe the summer is coming to an end and fall is just around the corner. Yesterday I was out for my daily walk and noticed a chill in the air and the leaves are changing. It seems a little early, but time is ticking on:)

I have more than a few projects on the go, which keeps me motivated. It also keeps me from getting bored.

When each one of my kids turn 30, I make them a quilt to commemorate the event. My son turned 30 this year so this is his quilt. It is very autumn-y and I love it! I was tempted to keep it for myself:) The pattern is called Autumn Splendor by Piecing the Past.

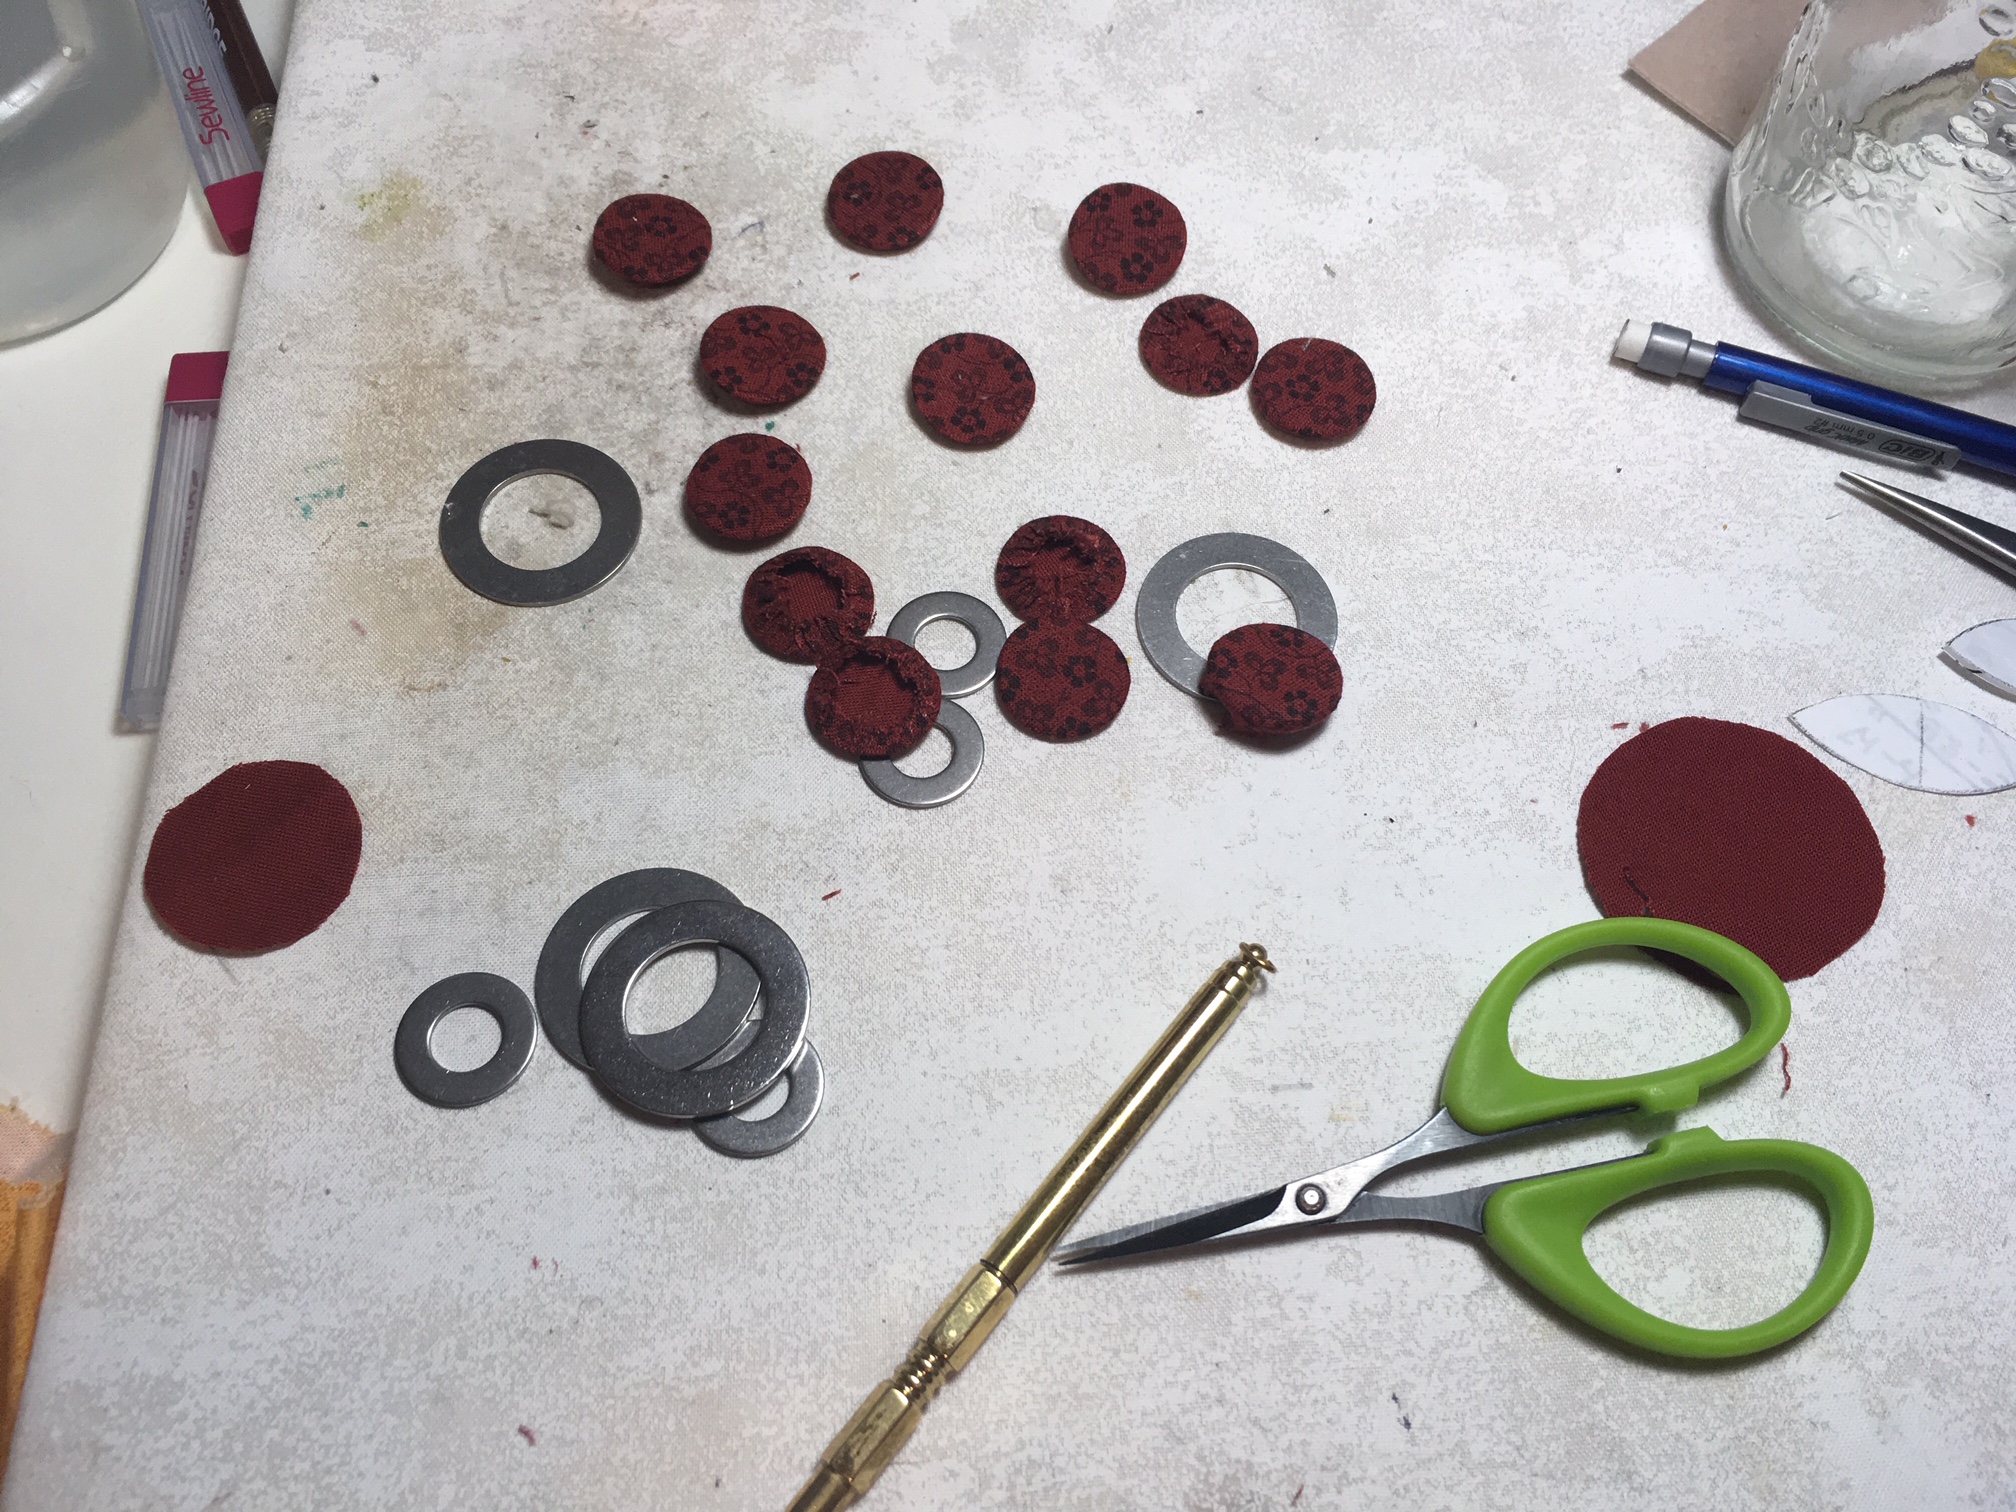
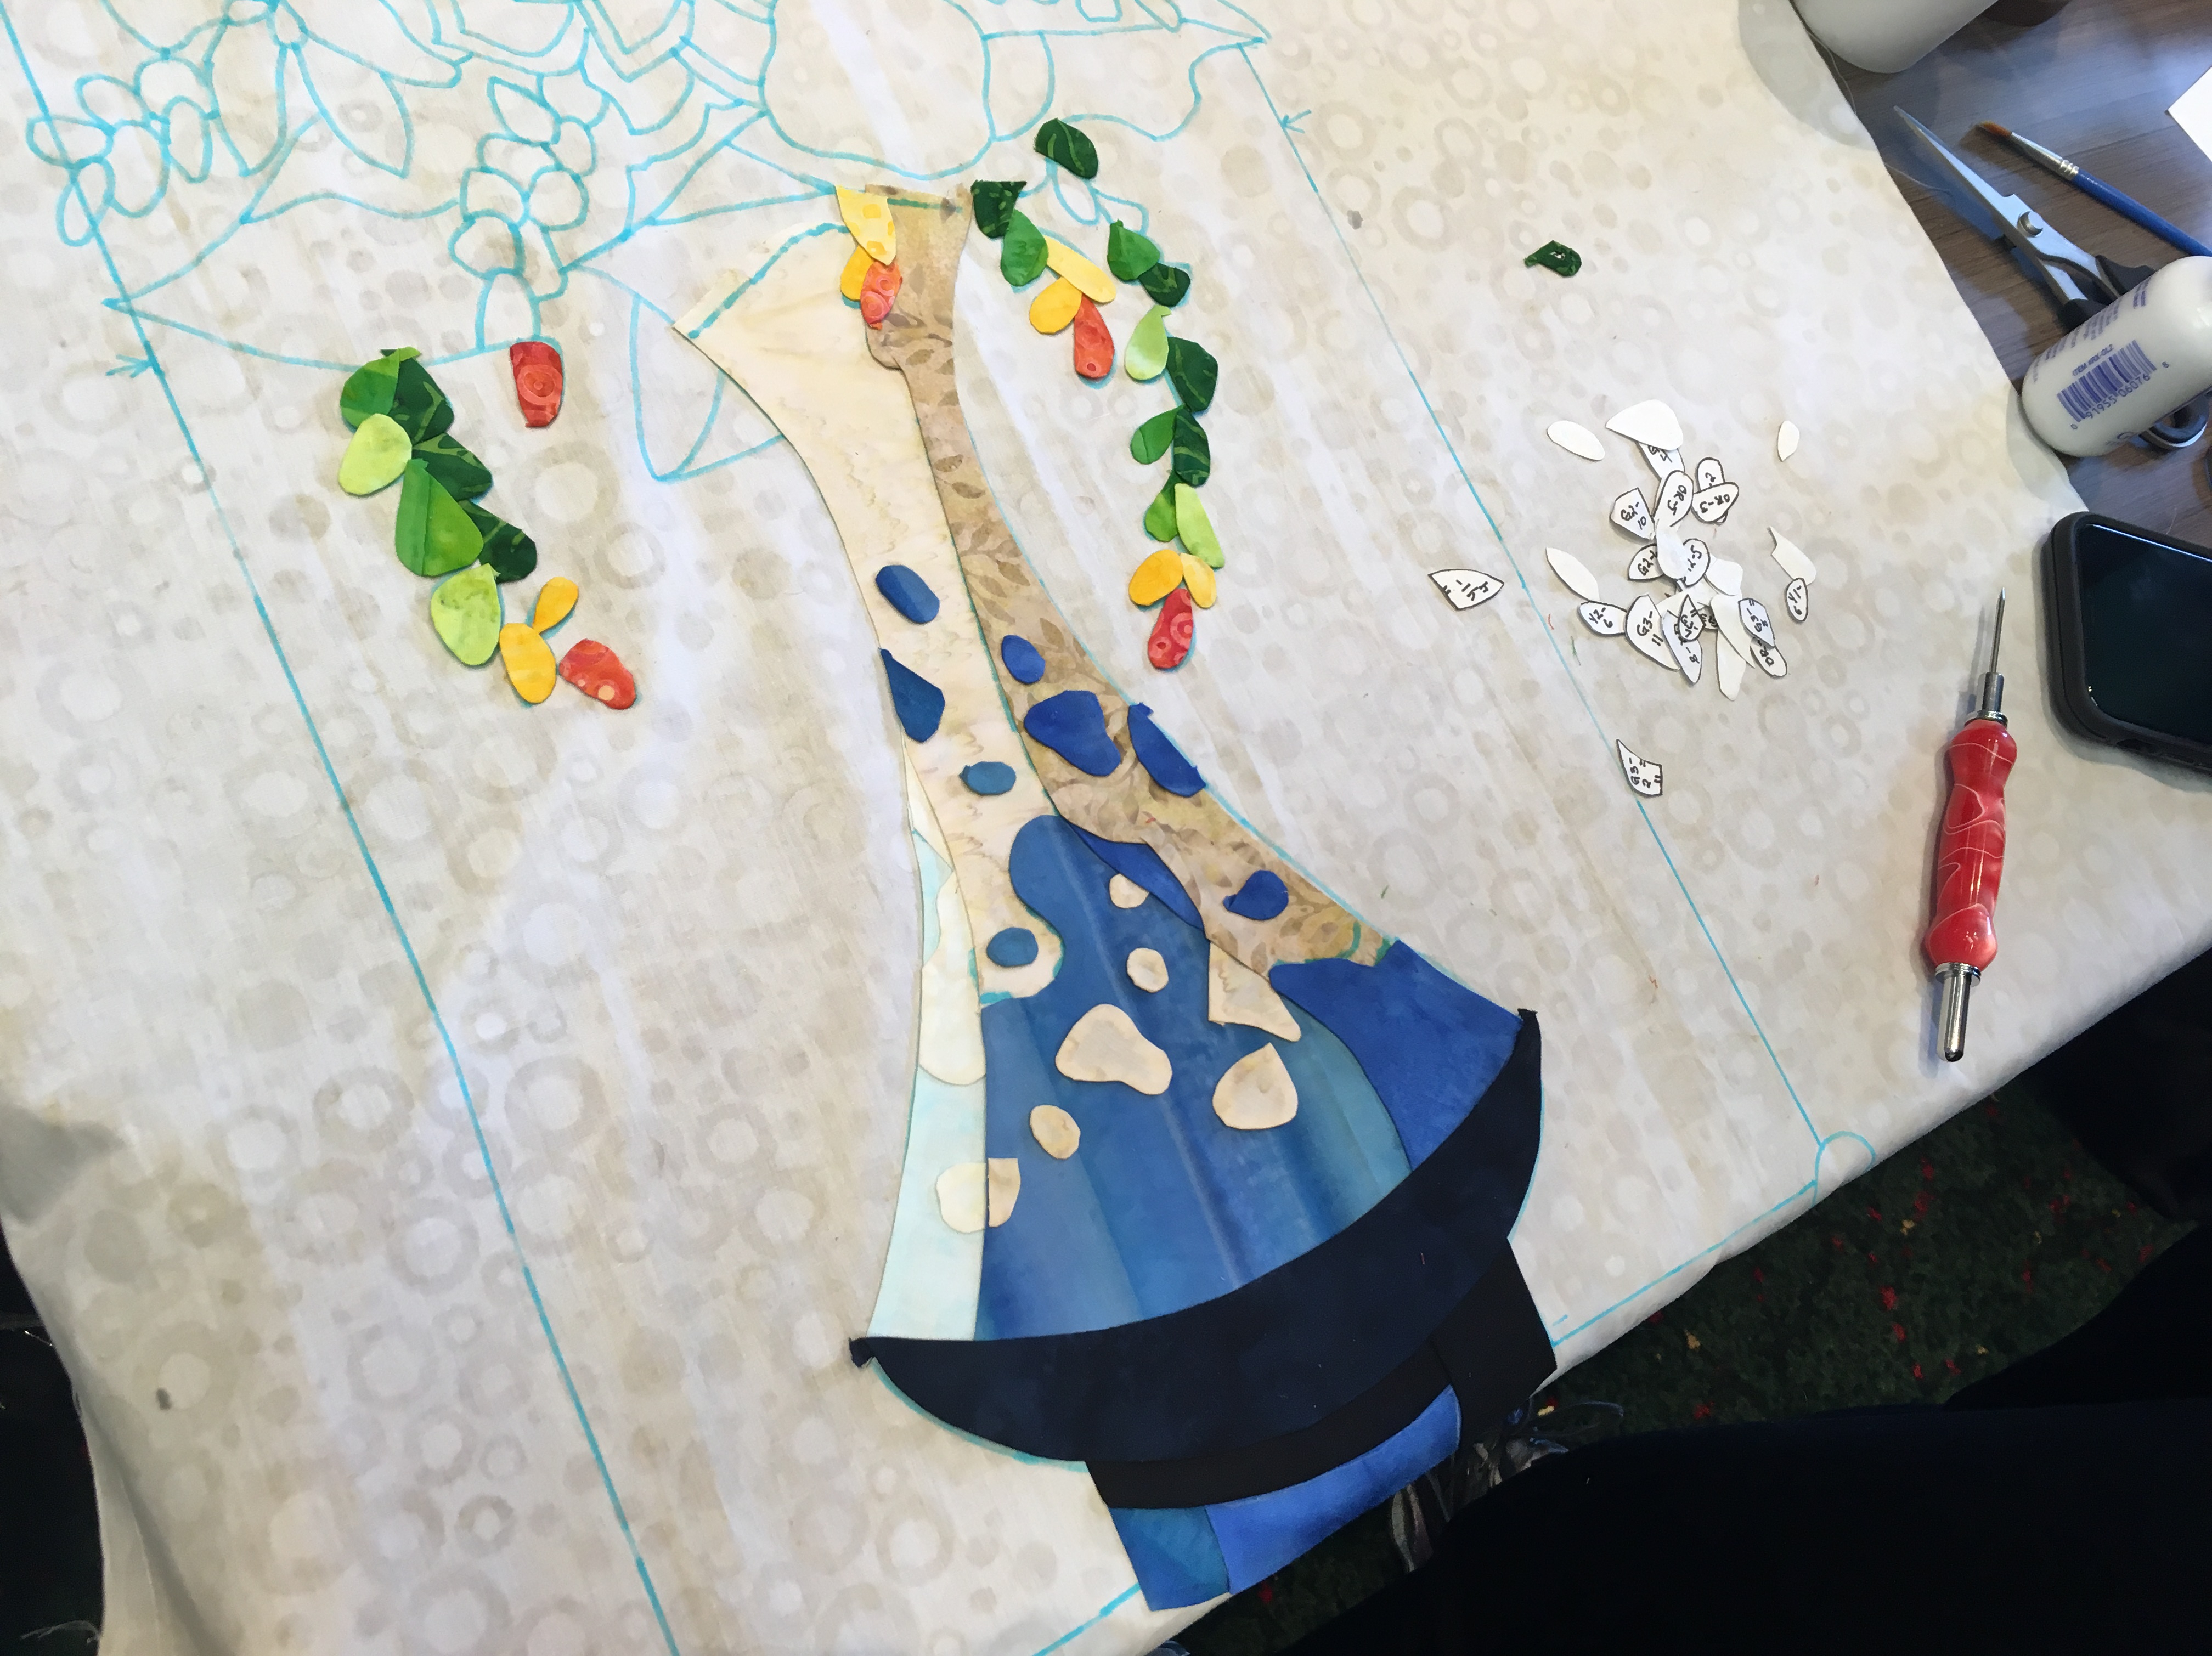
I just finished my second Lily Rosenberry block. As I mentioned before, each block will have different red and green fabrics, which is a bit of a challenge. I want the blocks to be similar, but not exact, if that makes sense. Making all of those circles is a breeze with Applipops (available on my website) It is the only way to go!

There is very little actual “prep” work when it comes to using Applipops. So quick and easy. So, as you can see, I am using 2 different size circles, one for the red berries, and another one for the yellow centres of the red leaves.

I whipped these up in no time flat!

The reason my blocks (below) are different sizes is because I always cut my backgrounds larger than needed to allow for shrinkage from stitching, and also shrinkage from washing my finished blocks in hot water. Sometimes the fabric does shrink up a good 2 inches. Yikes! Better to be safe than sorry. Of course, I will trim all the blocks down to correct size. To find out why (and how) I wash my finished blocks, you can read about it here.

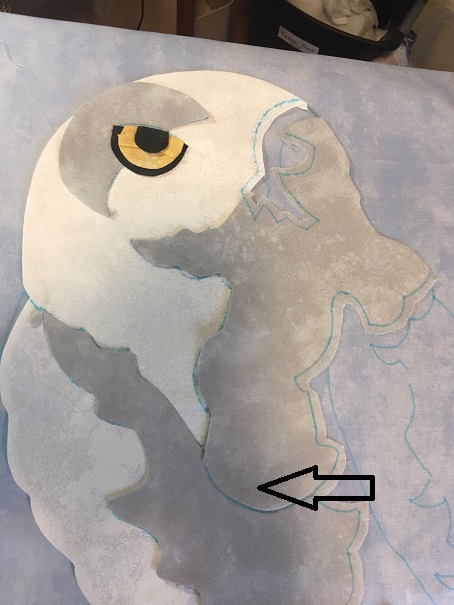
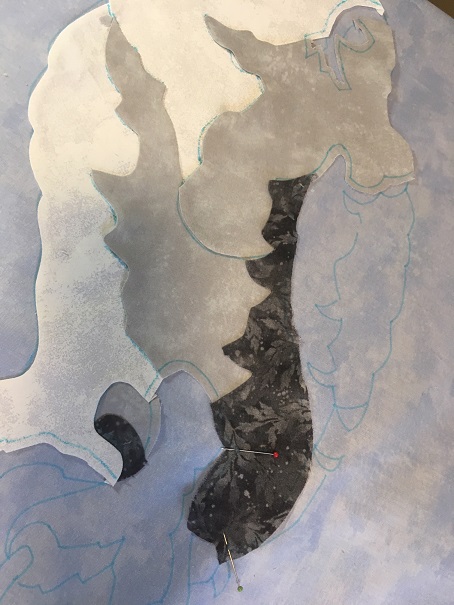
I just love the motion these blocks have when put together. I’m sure I will be even more impressed when all 16 blocks are completed lol. Also, I am still on the hunt for the perfect fabric for the vase.

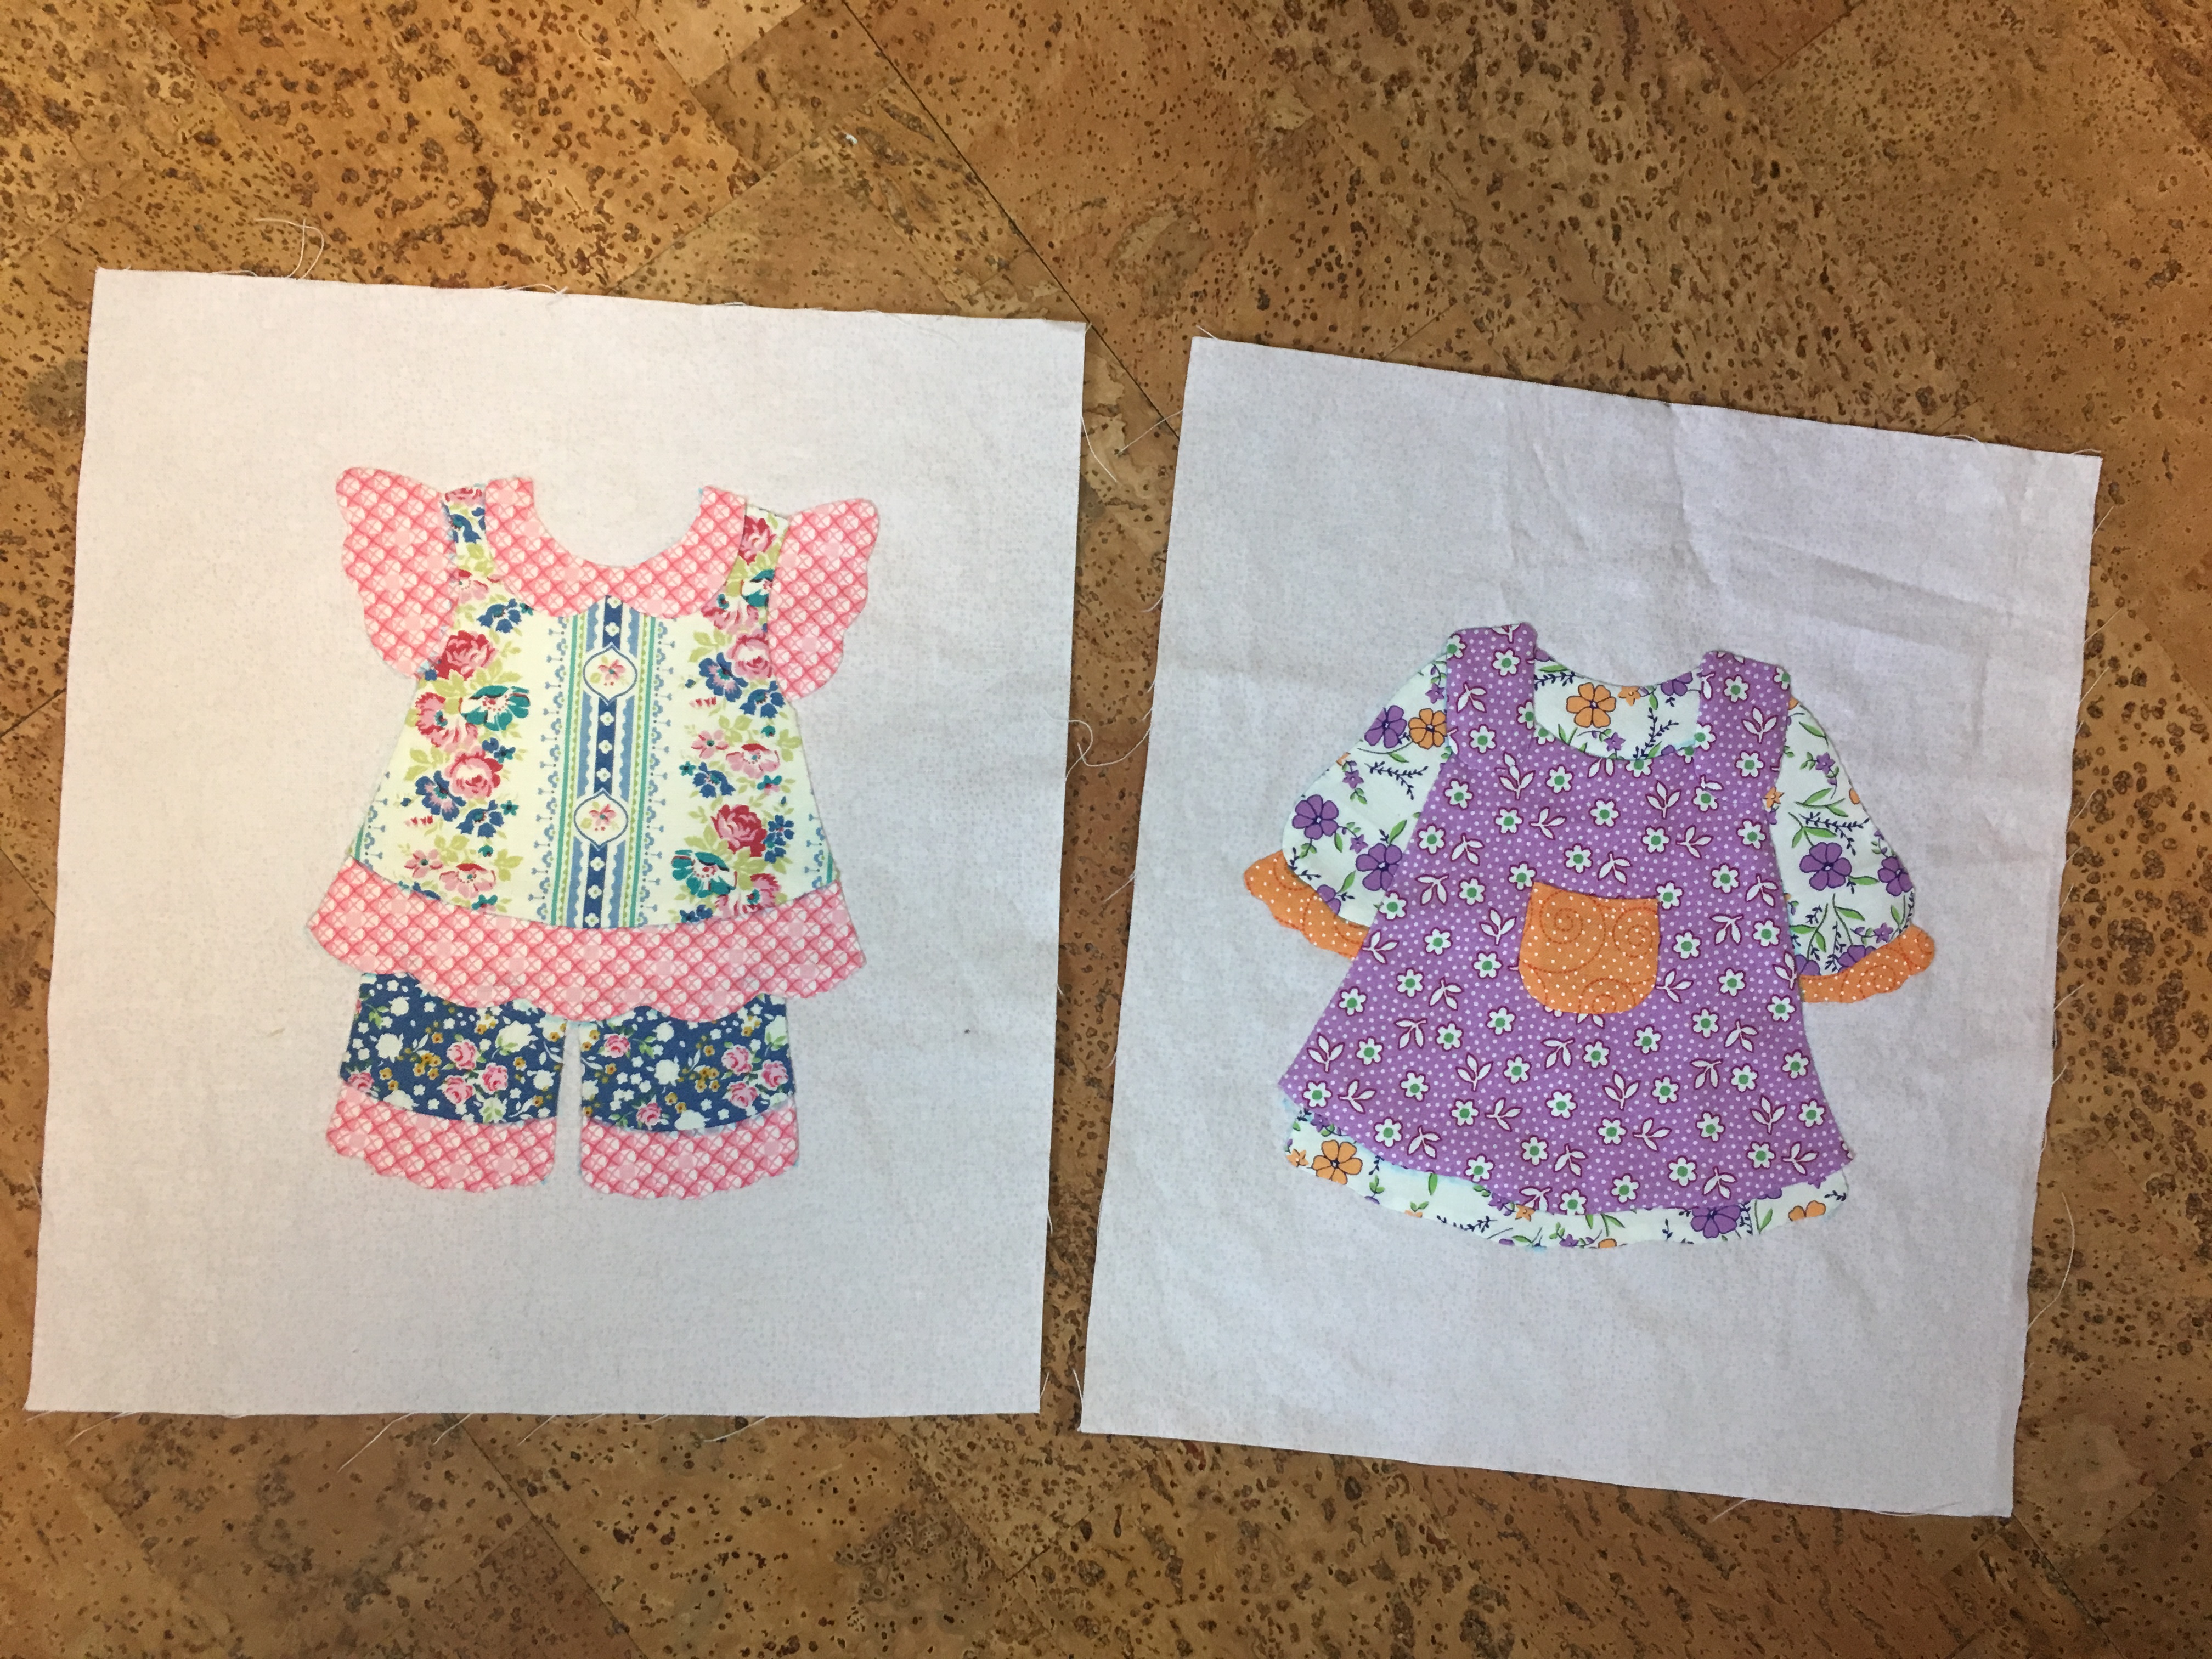
I am having so much fun working on my grandson’s and granddaughter’s “I Spy” quilts. The Smitten pattern by Lucy Carson Kingwell is the perfect pattern for this type of quilt. I made each of my older granddaughters their quilts using the same pattern. I especially love how each of the girls names have 5 letters each, so they fit perfectly in the one particular block.

So, when I started Spencer’s quilt, I was a little disturbed to find he had way too many letters in his name to fit in the block. What to do, what to do? I designed a whole new block.

I thought it needed a little something extra so I added a big blue circle in the middle, using Applipops. Again, very quick and easy!

That was better, but I thought it still needed a little something extra.

Fussy cutting (even tiny stars like this) is a breeze with Applipops!

Perfect!

Thank goodness my youngest grandchild’s name has 5 letters. Phew!

I adore fussy cutting, especially these guys! I have hand pieced each quilt, and I am in the process of hand quilting Spencer’s.

I felt like I won the lottery when I found this very boy-ish background for his quilt:)

Last, but not least, I am thrilled when students send pictures of their finished projects:) Nicole came to one of my retreats and here is her Chickadee block. Not only did Nicole do an awesome job on the hand applique, she also did a beautiful job machine quilting it herself. The pattern for the Chickadee block is available on my website as a paper pattern or a digital pattern. Either way, I have included the freezer paper templates for you:)

Til next time…

Kerry

Applipops Are Finally Here!


When I posted way back in June, I told you about the success (and fun!)I was having with Applipops, a really brilliant (and simple) way to make beautiful circles. I am thrilled to announce I now carry Applipops on my website. This next part is important: I am only shipping within Canada.

Pictured below is a Pro Pack, which makes 8 different circles sizes. 

Copy of AP_Promo_2-035

Pictured below is a Pro Pack Plus, which is 2 Pro Packs.AP_Promo_2-035_2 (1)

So, let me show you what I am working on, using Applipops. A while ago, I was looking for a new applique project. I decided that Sue Garman’s stunning “Lily Rosenberry” is the quilt I wanted to start working on. It was a big decision because I am used to making applique quilts with every block being different. Like my Bed of Roses, or my  Baltimore Squared Quilt, or any other applique quilt I have ever made!image0

IMG_0745

I love the novelty of working on a new and different block each time. The 16 blocks in Lily Rosenberry are all the same. I am hoping my very short attention span will not let me down and I will actually finish all 16 blocks.  I have chosen a Mary Koval cream background for the 16 blocks. I only have enough fabric for the blocks and not the borders. I am not worried. When it comes time to do the borders, I will have a few options…try to find more of the same fabric, find something similar, or maybe not even add a border. So many options. For now I will just concentrate on the blocks.

So I am going with a red, green and gold combination. I am going to use the same green for all of the stems in all the blocks. But I will use a different green in each block for the leaves. I am also going to use a different red and a different gold for each block, so no two blocks will be the same. At least, that is my plan. We will see!

Here’s how I started the first block.  I traced the pattern onto the fabric with a Clover water soluble marker.  As I started working on the block, I realized that this quilt is quite suitable for confident beginners  The pieces have nice, gentle curves, too.  So no points:)IMG_0334

Next, I started to prep my stems and leaves.  I glued them on the background using Roxanne’s Glue.  So far, so good!IMG_0336

Then I started to add some of the berries, which I made using Applipops.  IMG_0410

Looking good.  Really, really good!IMG_0407

Next, I wanted to work on the flower in the middle.  I prepped the yellow pieces, then I drew the seam allowance on the unprepped edge.IMG_0412

Do you see how nicely everything is lining up, simply because I drew the seam allowance on the unprepped edge.IMG_0413

IMG_0414

Next, I prepped the large red flower.  I did reverse applique to create the hole in the middle. IMG_0415

Once I removed the freezer paper template, I glued the flower in place.  Voila!IMG_0416

Then, of course, I continued on my merry way, making more Applipop circles to complete the block.  Are you ready?  Each block has 39 circles.  There are 624 circles in the blocks alone, not including the border.  Thanks goodness for Applipops. I have not decided on a fabric for the vase yet.  I am not worried. I’ll find something!  Just a side note…the larger yellow circles on top of the smaller red flowers were also made using Applipops:)IMG_0417What else have I been working on?  Like many quilters, I am trying to work through my stash.  I just completed Bonnie Hunter’s Jamestown Landing.  It barely made a dent in my blue and neutral scraps.  Oh well!  The neutral blocks are all string pieced.  I love string piecing!0D28B19F-F186-4DEC-9309-7582CAA2F03F

0836E4DD-C1F4-454B-B27D-72A2873CA828

DC84F4CC-5D2F-4BCE-9198-CFFC65CFFB18

I finished hand appliqueing and hand quilting  Briar’s quilt. This is an adorable quilt to make for that special little girl,  in this case, our granddaughter.  The pattern is called Dolly Days by Brandywine Designs.  Trust me when I say I had a really hard time giving this quilt up lol.

IMG_0283IMG_0306

In my spare time, I am hand stitching random hexies together, just for the fun of it!IMG_0423

IMG_0422

Last weekend, we could finally get a picture of all 4 grandkiddies together.  What a special time:)A9943568-8BB7-453B-846E-6C077AA24BFF

IMG_0386

Til next time…

Kerry


A Brilliant Way to Make Circles!

Most quilters who try hand applique, often resist doing circles, believing it is difficult to make a circle that is, indeed a circle, and not a wonky oval, with pleats and puckers. And I cannot blame you if you feel this way. Circles can present a few challenges, but this is a product that will change the way you think about making circles. Have you heard of Applipops?

Applipops is a family owned business with an amazing product, and Jillian reached out to me and asked if she could send me a set, give them a try and then give her some feedback. I must confess I had never heard of Applipops, so I went on the website. Immediately I was impressed with the simpleness, but at the same time I was struck with the brilliance of the product. I eagerly awaited for my Applipops to arrive, so I could give them a try. The skeptical part of me thought that they may be too good to be true.

As soon as my 2 sets arrived in the mail, I read the directions, and dove right in. I am going to go on record and say that every applique-ist must own a set (or 2)! One of the reasons I am so excited about Applipops is that I am getting ready to start Lily Rosenberry, a Sue Garman pattern that has been on my bucket list for far too long. This is the method I will be making the many, many, many circles.

Here is a bit of a demo, but make sure you visit the website to get some extra information.

First I cut a square of fabric. It doesn’t necessarily have to be a square, you can use scraps if you like. Next, I chose the size of metal ring that I want my circle to finish at. (3/4″ diameter).

Next, I placed the piece of fabric over the metal ring.

And then I added the next biggest ring on top of the fabric. I found it best to do this on a hard surface. Press the top ring so it snaps onto the bottom ring.

Trim the excess fabric using the outer ring as a rough guide.

Turn it over and you can see that you now have a seam allowance sandwiched between the 2 rings. (Brilliant!) So with just my fingers I coaxed the seam allowance over the smaller ring.

Next, I used my iron and stiletto to press the seam allowance over the smaller ring. You want to coax the seam allowances to the centre of the smaller ring, making sure you have no pleats or puckers. At this point the rings are very hot, which is why having 2 sets is a really good idea. As this circle cools down, I started another circle. Quite the assembly line!

At this time I was still thinking…”wait a minute, this is too darn easy”. So then I separated the rings and, voila! A magnificent circle! Important tip: before you separate the rings, take a good look and make sure there are no puckers or pleats. If you do have some unruly pleats, just add a dab of starch and rework it. Easy Peasy!

I removed the inner circle, gave it a good press and there you go!

So then I thought “that was easy enough but what about that wee little one?” So I gave the wee little one a try. Exact same easy method, EXCEPT, your seam allowance should be smaller, so it easier to work with. I was so impressed! Before I forget, make sure you check out Applipops Instagram page. Prepare to be blown away by Ellen’s amazing quilts! Also, check Applipops out on Facebook:)

So, what else have I been working on? Well I finished my Unity Quilt, which Bonnie Hunter kindly designed in March as soon and we ordered to stay home. I was going to add an outer border, but I think it looks good just the way it is:)

I am thoroughly enjoying hand quilting Briar’s quilt.

Til next time….
Kerry

Still working away…

My goodness, what interesting, challenging times we are living in.  Thank goodness I have my quilting to keep me busy enough that I do not have too much time to think about what is going on in the world.  Don’t get me wrong, I watch the news every night,  but quilting is a great escape from real life.

Lately, I have been getting photos sent to me by (mostly) students who have finished their projects.  Here are just a few of them…

Joanne completed her Bed of Roses (a Sue Garman pattern) that I offered as a BOM many moons ago.  Joanne sent it toRose of Fancy Feathers to be machine quilted.  Both Joanne and Rose are to be congratulated for creating this masterpiece.  I’m so excited, I have goosebumps:)image1

image0

Carrol finished her Hummingbird in Flight project and it is absolutely gorgeous.  And check out the awesome wooden quilt hanger that her husband made to display this beauty!  The Hummingbird in Flight pattern in available as a paper pattern or a digital pattern on my website.  Rose of Fancy Feathers also machine quilted this for Carrol.

carrol_reid

Cora also completed her Hummingbird in Flight (without taking a class!)  Just shows you how easy this technique is to master.  Cora has found hand applique to be a perfect way to keep her hands busy while watching TV.  Can’t agree more:)20200501_125617

Darlene took my Southwest Succulents class at the Academy this past March.  I must say I am speechless….It is beautiful, gorgeous AND finished!  It even has a binding on it!  Darlene even did her own machine quilting.  I am impressed.  So Darlene has named this masterpiece Korona Vase, because she spent so much time on it during the lockdown.  Take a really, really good look at this!  The machine quilting is so simple, but so very effective.

Karona Vase 5-12-2020

I finally found a place to hang my Yellow Finches, which was the other project I taught at the Academy in March.  The Yellow Finch pattern (both paper and digital) are now available on the website.084

I am working on a number of different quilt projects, just to keep myself from getting bored.  I am hand quilting Briar’s quilt and I am loving the process.  Every afternoon I sit by the window and stitch for an hour or so.  Very relaxing.  Briar is 2 1/2 months now.  Time flies:)IMG_9890

I am still plugging away at Afternoon Delight, which is being offered by The Quilt Show as a BOM.  I love each block, but especially this one!055

I fussy cut the blue pieces and I love the effect.047

048

Of course, I am working away on Briar’s  and Spencer’s “I Spy Quilts”.  I am using Lucy Kingwell’s Smitten pattern.  I am hand piecing  both quilts at the same time.  It is so fun making these blocks to suit each grandchild.

IMG_9878

One of Briar’s Moms plays hockey and loves the Toronto Maple Leafs!

IMG_9888

IMG_9874

Love this one for Spencer!IMG_9922

IMG_9923

And last, but not least, I am making Bonnie Hunter’s Unity quilt.  Loving the process, and using up a load of my scraps!034

I found this fabric in my stash with baby footprints on it and cut 3 pink feet and 1 blue foot to represent the grandkiddies that I am missing while I make this quilt.  Each foot is  a cornerstone in one of the rounds.  So much fun and using up fabric I didn’t even know I had!038

023

Stay healthy!

Til next time….

Kerry


Keeping Busy:)

Like most you, I am self-isolating.  I’ve always thought of myself as a “home-body”.  Happy to be home working on my quilts and enjoying my own company.  But this is really hard!  I’m surprised at how many times a day I catch myself saying “I’ll just pop out to the store because I need (fill in the blank!)”.  I’m telling my kids to pay attention to what is going on in the world because these are historical moments we are all experiencing.  Let’s be kind and compassionate as we navigate these uncertain waters together.

On February 29, our granddaughter Briar was born.  A leap year baby!  She came into the world at 1 am in the middle of a snowstorm.  At 6 am of the same morning, I was pulling out of the drive-way, packed up and ready for the 12 hour drive to Williamsburg to teach at the Academy of Applique.  So, of course, the first thing we did when I arrived home a week later was to get in the car and go visit the wee one and her awesome Moms.

332.JPG

IMG_9369

298

IMG_9365.JPG

The pups were happy to see me:)336.JPG

I have been working on Briar’s quilt for a few months.  It is Dolly Days by Brandywine Designs.058

I started by making all of the outfits that go around the outside.  This was fun!  I used 2 different background, a pink stripe and a pink tone-on-tone.  I had bought a bundle of Apple Butter by Tilda (fat eights) at Quilt Canada last year and thought this was the perfect project.  Here are some of the outside blocks.101

105

104

103

Some of the outfits called for buttons, but I think that would be a no-no!  So I made tiny circles for the buttons and appliqued them on.  I even fussy cut a few!IMG_9193

IMG_9191

So once all the outfits were stitched, I had to trim them down to the correct size, which is something I always do.  Cut my backgrounds big to allow for shrinkage and then trim to the correct size.  I made my self a template of the correct size, including seam allowance and drew a few guidelines on it.  I simply placed this template on the design and “eyeballed” it.  Easy Peasy.  I then put marks on the background at the corners of the template.  Then I used my ruler and rotary cutter to trim the blocks.109

110

111

Can you see that I have used 2 different background, and alternated them?  So subtle:)112

So now I could start working on the little girl in the centre, but I was a little stuck.  I knew I wanted the quilt to be pink, but if I made the background pink, the skin tone of the little girl wouldn’t show up.  So I went through my stash and found some of the same white and turquoise polka dot that I used for my grandson’s quilt.  By the way, Spencer is 5 months old now and quite a cutie!

182

As you can see she started out with turquoise socks, but i wasn’t really feeling it, even though the socks and shoes were stitched in place. 156

I switched her socks to pink and auditioned some fabrics for her under clothes.  I probably put way too much thought into this, but that is what we do!159

Isn’t she sweet?IMG_9253

Til next time…

Kerry


Back home from teaching at the Academy of Applique

What can I say about my experiences teaching Prepared Edge Applique at the Academy of Applique?  It was awesome, inspiring and exhausting (but in a good way!).  Teaching at the Academy is the highlight of my year.  To be surrounded by fellow lovers of applique is so inspiring and recharges my creative batteries.  If you have never attended the Academy, please give some thought to attending next year’s Academy.  You won’t be disappointed:)  Here are a few photos from the 2 classes I taught, Southwest Succulents, and Yellow Finches.  I was blown away by the student’s fabric choices and how each vase had a different “feel”.IMG_9295

IMG_9297.JPG

IMG_9285

IMG_9286

Here are some pictures from the Yellow Finch class.IMG_9330

XQSB5720

IMG_9332

IMG_9319

NHMT9782Here are a couple of eager students (below). Donna (on the right side of photo) has never tried prepared edge before.  Her first (!) attempt at a circle is in the photo below.  Are you as impressed as I am?  Wow! PIJQ0748

264

It is always exciting to see some completed projects from previous classes.  Thanks, Pat, for sharing her Rose of Sharon, a class from last year.  Pat hand quilted her masterpiece and it is stunning.IMG_9316.JPG

And Peggy’s project from last year is fabulous!  Also hand quilted.  Inspiring:)262

Here is a mother/daughter quilting duo.  So nice to see the next generation discovering the joy of creating something beautiful.303

304

277

So, in the photo below, you can see that the leaves in this project are all “split”.  That means that each leaf has 2 pieces, a light green and a dark green, or in my sample, green and mauve.  I love the look of split leaves, but I have struggled in the past, trying to get a nice smooth point that is not all bulky and yucky.  So I came up with this method that I shared with my class, and I am happy to share with you.

289

In the class, I provided 2 copies of the freezer paper templates for the leaves.  So I prepped the freezer paper as usual, with a blank sheet of freezer paper underneath to create a thick template.  Here are both identical templates.

IMG_9383

Cut both out, but leave one “whole” (don’t cut down the middle).  The other one can be cut into 2 templates.  Set the “whole” one aside for now.IMG_9384

Iron both of the “cut apart” templates onto the back of desired fabrics.  Cut out, leaving a 1/4″ seam allowance all the way around.

IMG_9385

IMG_9386

Now, prep the centre line only on the mauve piece.IMG_9387

Pop the template out and mark the top and bottom of the template with a marker that you can see on the front of the piece.  Set this mauve piece aside for now.IMG_9388

IMG_9389

Take the template off the back of the green  fabric and place it on the front, leaving 1/4″ around.IMG_9390

Mark the centre line, and the top and bottom of the template.IMG_9391

Okay, now put a few dots of glue on the prepped edge of the mauve section and place it on the green section, using the  lines as a placement guide.  IMG_9392

IMG_9393

Stitch the mauve section to the green section.IMG_9394

Flip the stitched leaf over and place the “whole” template, lining up the top of the template and the line of stitching.IMG_9397

IMG_9398

So, now, you can go ahead and prep both sides of the template as you normally would.IMG_9399

Voila!  A perfect split leaf!IMG_9411.JPG

Til next time…

Kerry

Binding and Labeling!

For the past month or so, I have been working on finishing up projects just so I would not be bringing anything unfinished into this brand new year.  2020!  I hope everyone had a wonderful Christmas and a very healthy New Year.

Last fall our grandson  Spencer as born and (of course) I made him a quilt.img_8214

I had so much fun making this label and I cannot wait to stitch it onto the back of his quilt.  I use Illustrator to draw my labels and then print them out on fabric.JLGZ5911

CKHD9225

Five years ago I made this label for the back of my granddaughter Grace’s hexie quilt that I made while Mom was expecting her .  Notice it is hand appliqued and hand embroidered.  Did you notice that Spencer’s label is not lol.  You can read more about this label heredscn6353

Speaking of hexie quilts, I started this quilt 5 (!) years ago and just finished it.  I’ll be honest I did not work the whole 5 years on it.  In fact, I remember a time I couldn’t find the quilt.  It was in a bin somewhere.  But I persevered and here we are!  I called this quilt “Mad About Hexies”, because I am!IMG_8635DSCN7624

IMG_8962

And, here is the label!  I really like to personalize the labels, just so there is no question who each quilt belongs to:)img_8961.jpg

For my granddaughter’s hexie quilt, I used paper templates and did English Paper Pieceing (EPP).  When I finished, I knew there had to be and easier, more efficient way to do hexies (any shape, really).  I discovered Inklingo and that is the method I used to make “Mad About Hexies”.  Inklingo is so much faster, efficient and easier.  I am using Inklingo to create the 60 degree diamonds to make my next hand pieced quilt.  So much fun!!

IMG_8966

Til next time…

Kerry


The Snowy Owl…continued

As promised last week, the Snowy Owl pattern is now available for purchase on my website!  You have the option of purchasing the paper pattern or a digital pattern.  Either way, you will get 6 pages of templates already traced.  That means you can start prepping right away:)

Our grandson, Spencer Chad Nevin Counter Hatton (whew!), arrived right in time for Thanksgiving:)  How exciting!  Here he is just less than an hour old.IMG_8369

In my last blog post, I showed you how to prep the irises for the Snowy Owl block.  Did you know that the Snowy Owl is the provincial bird for the province of Quebec?  True story:)

So I started with the partial head, the gray detail and the eye.  I just couldn’t wait to see those eyes.IMG_8407

IMG_8408

IMG_8409

Do you get the feeling that someone is watching you?IMG_8410

This small gray piece is the next one to be glued in place.IMG_8411

Then this dark gray one…IMG_8412

The large white body/leg section is the next piece to add.IMG_8413

And then this light gray piece.  Notice how everything is lining up nicely?  Even I am impressed lolIMG_8415

The next gray piece to be added is actually an extension of the gray piece already in place.  I thought it would be easier to cut this large section in 2 smaller sections and try to make the join as inconspicuous as possible.

IMG_8416.JPG

As I add each section, I am making sure that everything lines up to the traced image on the background.  I use a pin and stab through the both layers to make sure it all lines up.  Better to be safe than sorry!IMG_8417

Wow!  It’s actually starting to look like something!IMG_8418

Til next time…

Kerry


Digital Files now available!

For a while now, I have been getting requests for my patterns to be available in digital format.  The patterns for my quilt, To Everything There Is A Season, has been available in both digital and paper patterns.  You can order single blocks, or, if you are feeling ambitious, you can order the whole set:)

So my next project over the next couple of months or so, is to add all my other patterns as digital patterns.  I have started with The Hummingbird in Flight, and The Chickadee and Purple Violet patterns.  When you purchase these patterns, you will receive the file, which you will then download to your computer, and then print out at home, or take to your favourite copy place and they can print it out for you.  You will also receive a colour picture of the project, a list of fabric requirements, a list of supplies needed, general instructions, and, most importantly, a copy of the templates, which you can photocopy onto freezer paper.  In other words, you will receive everything you would if you ordered the paper pattern. (The templates have been created for Prepared Edge Applique.)  IMG_6920

Speaking of the Chickadee and Purple Violet pattern, I recently did a tutorial on my blog, which shows the construction of this block, from start to finish.  I even showed you how I make a caterpillar:)  The tutorial is actually spread out over 4 or 5 blog posts.  Everything in that tutorial can be applied to constructing any applique block using the Prepared Edge Applique method.  Did you know that the Chickadee And Purple Violet is Block 1 of a series of 13 blocks called “Glorious and Free” that I am creating to celebrate the provincial birds and flowers of Canada?  It’s true!IMG_6911

A few months ago, I started working on Block 2 of this series, The Snowy Owl and Blue Flag Iris, but I got a little side tracked with other stuff (that’s my story and I’m sticking with it!).IMG_8349

And those eyes!  This pattern will be available on my website as a paper pattern and a digital pattern next week after I double check the freezer paper templates.IMG_8350

I started with the irises because I thought they were the easiest place to start.  I traced the pattern onto my background with a Clover water soluble marker.  I like to use the thick marker, but the thin works just as well.  I use Roxanne’s glue to glue all of my pieces onto the background.

047

048

051

053

057

058

In my next blog post I’ll show you how I constructed the owl:)061

Til next time….

Kerry


The Hummingbird

Recently, I have taught The Hummingbird numerous times as a workshop in local shops, and for local guilds.  It is a good teaching block, it covers almost everything you need to know about Prepared Edge Applique.  In the class, most students get the leaves, stems and flowers prepped and glued onto the background.  At the end of the class I describe how the hummingbird is put together, but I think a visual guide will help those who have taken the class.  I think it is also a good tutorial for anyone looking for a few hints about how to put a rather complex design together.  Hint:  It only looks complex 🙂  The Hummingbird pattern is available on my website.  The pattern includes the freezer paper templates already traced, just to make your life easier:)

So here is the block with the leaves, stems and flowers in place.1

The first piece to be glued in place is the “back” wing.IMG_8291 (1)

Now, the row of small wings can be placed on the background, starting at the bottom and working towards the top.IMG_8292

IMG_8294

Next, we can add the remaining feathers, the gray head and white detail.IMG_8296

We are going to add the gray body next, but only apply glue to the seam allowance as shown.IMG_8297

Glue in place, but leave the bottom section open (that is why we aren’t putting glue on that section).IMG_8298

Add the large wing, paying attention to where the seam allowances are lining up shown in the circle (very important!).IMG_8299.JPG

The pink underbelly can now be glued in place.  It is starting to look like something, isn’t it?IMG_8300

So now this is the tricky part.  Lift the gray body up and pin it to stay in place.  I just put my stiletto on top of it.  That works too:)  Now we can start to put the tail feathers in place, starting with the tail feather on the right and working to the left.IMG_8302

As you can see, the last tail feather goes on top of the pink underbelly, and the large turquoise feather.  Then the gray body (the part with no glue on it) goes on top of the tail feathers.IMG_8303

Add  a few dabs of glue and put the gray body in place.IMG_8304

Next we can add the beak and the eye.  The point at the end of the beak is tucked underneath the purple flower.  Easy Peasy!IMG_8305

Til next time….

Kerry